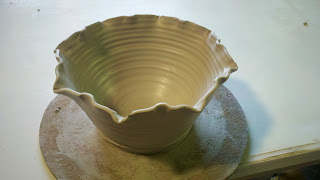
Nearly a year ago now, Mudbug Creations came into existence. Through the help of family and friends, my ceramics small business came to be. Every day is a learning experience and I wouldn't have it any other way. Last Christmas, I got a wonderful present as well. I received a large metal trashcan with a few yards of inch thick insulation. I was ecstatic! Confused? No worries, I will clarify. I got to make my own backyard raku kiln!
So this is my attempt at a tutorial for making a raku kiln out of a trashcan and a few other materials.
Materials:
standard metal trash can and lid
1-2 inch thick Ceramic Fiber Blanket (insulation)
high temperature wire
ceramic buttons
propane torch
regulator
propane tank
scissor
marker
gloves
I would recommend wearing gloves while you go through this process. The fiber blanket can itch and create small cuts on your hands otherwise.
1. Roll out the fiber blanket and place the trashcan on top of it. With your marker, trace around the bottom of the trashcan. Cut out the circular piece and place it in the bottom of the trashcan, making sure it fits snugly.
2. Place the lid on the fiber blanket and trace around it. Cut out the circular piece and set it aside. It will go on the inside of the lid later.
3. The kiln will need a vent where the propane torch will go in. Two inches up from the bottom, cut a circular hole that is 4-5 inches in diameter.
4. Line the can's interior with fiber blanket, letting it hang over the top slightly. We were using scrap insulation, so we had to cut pieces to fit.
5. Every four or so inches along the top, we slit the insulation so we could fold the excess fiber blanket over the edge.
6. We then pressed the slit insulation tight to the kiln and wrapped the high temperature wire around it. We twisted the wire tight and it holds the insulation down tightly.
7. The bottom vent is now covered on the inside with insulation. Cut that same circular vent out of the insulation so the vent goes all the way inside the kiln.
8. Cut a 4-6 inch circular vent in the center of the lid.
9. Cut the same size hole in the insulation that will go in the lid.
10. Now you need to drill or punch pairs of holes around the vent and the edge of the lid.
11. Place the pre-cut insulation in the lid so it fits snugly.
12. Now, cut short pieces of wire. Each pair of holes will need a wire. Use the wire to tie the insulation to the lid. When you put the wire through the holes, make sure to add a ceramic button to the insulation side. Since I forgot buttons on my first go round, I have added a picture from
http://www.nwaudio.com/rakukiln.html
That link helped me a lot when I was working on mine. Check it out!
Once you have added the insulation to the lid, you have a completed raku kiln!
It will hopefully look something like this.
Once you've made it this far, the propane set up is fairly simple. I set it up like so:
Please remember that raku firing in this sort of kiln can be dangerous. Be aware of your open flame. Also, zinc galvanization is harmful to you! The outside of the kiln gets incredibly hot and it will galvanize the metal. Please stay away from the kiln while it is at full temperature during the first firing so it may galvanize without you breathing it.
Also, a tip. If you are firing in the fall or winter, make sure to the put the propane tank in a warm water bath during firing. This keeps the tank from freezing up. If it freezes up, the kiln will fire but never make temperature.
If my instructions didn't make enough sense, please check out these two sites for more help!
They are incredibly knowledgeable and will be of great help.
Thanks for reading!


