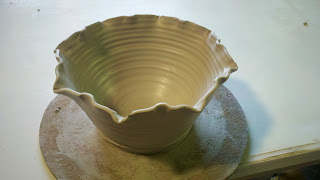
We shall see if it works out. I will post finished pictures once it is glazed!
Sunday, February 24, 2013
More Tea-related Business
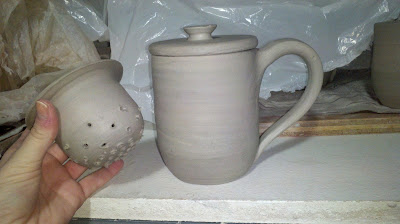
As I continue on my quest for amazing tea, I have decided to make tea mugs with lids. And strainers! It is incredibly tedious and annoying, I have to admit. It took me ten minutes to poke tiny little holes in the strainer piece and then I will have to fill the holes with toothpicks to hold to holes open when I glaze it. But...worth it. I think it turned out rather nice for a first shot at it. Mmhmm mmhmm.
Thursday, February 14, 2013
Trying my hand at something new....
I am not usually one for making plaster molds. It's tedious, frustrating, and I am frequently impatient. However, I got my hands on a brain model and would just love to have porcelain brains hanging around in some gallery. So I set off to make a brain mold. I decided to do it the long and safe way.
Lo and behold!! A plaster brain. However....not all was well....
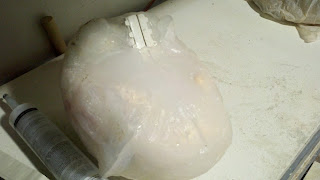
So I wrapped the brain in all-purpose silicone. Before that, the brain was coated in a vaseline like wax, so the silicone would slip right off.
I then built up clay around the silicone mold to make a mother mold. Since silicone is so flexible, it has to have a plaster outer coating to prevent expansion of the mold. So I started to pour plaster.
And poured.....
And sealed.....
And poured again.
So I finaly had a mother mold! I pulled out the plastic brain, sealed the mold back up, and poured it full of pottery plaster.
Lo and behold!! A plaster brain. However....not all was well....
The top turned out great.
But the bottom didn't fill up! Ooops. My pour hole was lower than the top of the mold was.
It created a very flat bottomed brain.
Plus....I didn't get it sealed up quite right, so there was a horrible seam line down it as well. But I love it anyway.
I have resealed the brain. Poured a tighter mold. And added more pour spouts so I can fill every aspect of the brain.
And by tomorrow, we will see how it went. It's a work in process and I will keep updating as I go along.
Friday, February 1, 2013
Beautiful Burgundy
Sunday, January 27, 2013
ForgetMeNotsDailyDiscoveries on ETSY: Shop Profile - MudBugCreations
ForgetMeNotsDailyDiscoveries on ETSY: Shop Profile - MudBugCreations: http://www.etsy.com/shop/MudbugCreations To me there is something quite magical about taking raw materials such as clay and turning th...
Tuesday, January 15, 2013
Tea trays and happiness
After Christmas, I realized that my best seller, by far, is the teabag mugs. Love making them. Particularly clever things. And fun! So I wanted to expand on those mugs into little sets. I thought on it for a while and decided to poke around with how much I love tea. And I love options for tea. In restaurants sometimes, the waiter will come out with a wooden box of 12 different teas or so. I want that option when I serve tea to friends! So I decided on a little tea tray with compartments for different bagged teas so there are always choices. I love choices.So this is what happened!
I love it. This one is mine. Then I will make more! Ta for now then.
Monday, September 24, 2012
A Little Flare
Bakeware and serving dishes have been weighing on my mind lately. My
absolute favorite piece to throw is a pie plate. The smooth rim with
small scallops are just sublime to me. That little bit of detail makes
the piece a little more dynamic. I began to wonder how I could spiff up
my casserole dishes as well. I usually stick to a single smooth rim.
This time though, I decided to play with my modeling tool a little bit. I
threw a dish with a double rim and then detailed it. It was a blast and
now I have a new favorite form!


Just that little bit of detail makes a world of difference. A little flare goes a long way.
Wednesday, September 19, 2012
Floral Edge Bowls
It struck me today that I had not made any large bowls recently. And, low and behold, I checked my inventory to discover that I was completely out of large and medium bowls! So I hit the wheel and decided that smooth rims were no good today. So I start to play with crimping and folding the rim of the bowl instead.
This is a basic two finger crimp on a wide mouth bowl.
This came out much more flowery or petal-like. Some spots were crimped out and others were crimped in.
Side view of a two point crimp.
Top view of a two point crimp.
Top view of the flower crimping technique.
It was quite fun! I love how a simple crimp patter can create a much more dynamic piece that a smooth rim. However, I still like both. It is completely dependent on my mood each day.
Subscribe to:
Posts (Atom)


